Inspections and certificates
Download certificates
1) Download certificates for whole functional location / customer
Certificates for a complete functional location can be downloaded via tile: Certificate download (via dashboard tile)
2) Download individual certificates directly on the equipment
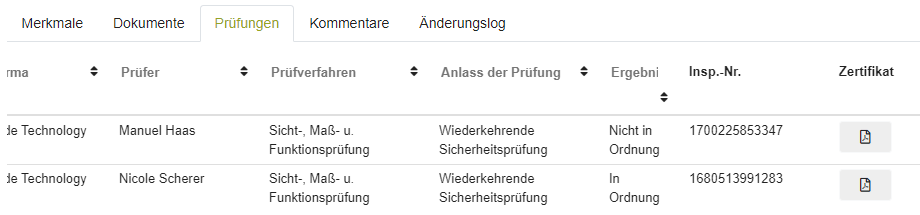
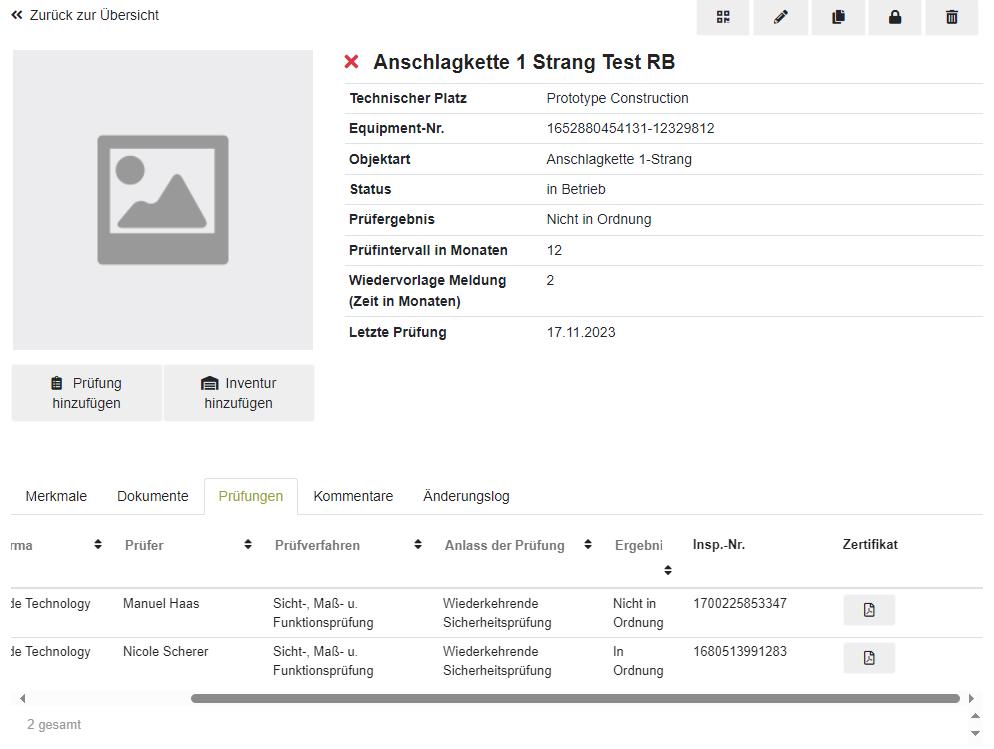
Certificates can be downloaded individually via the corresponding equipment under the tab inspections. To do this, just click on the icon in the bar of the corresponding inspection.
When downloading certificates of a specific functional location or a specific time period, you can use the "Certificate Downloader" function on the dashboard or in the respective functional location.
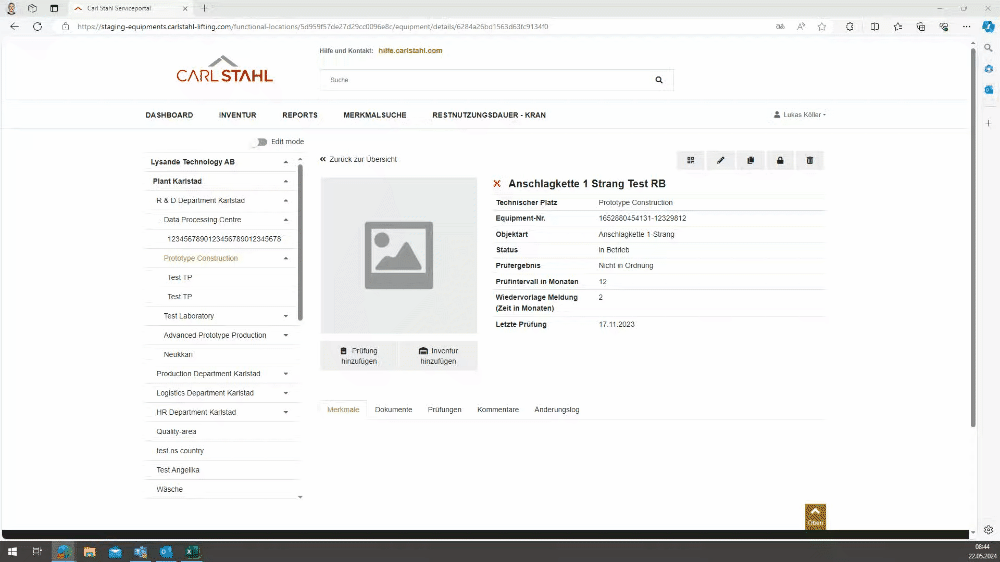
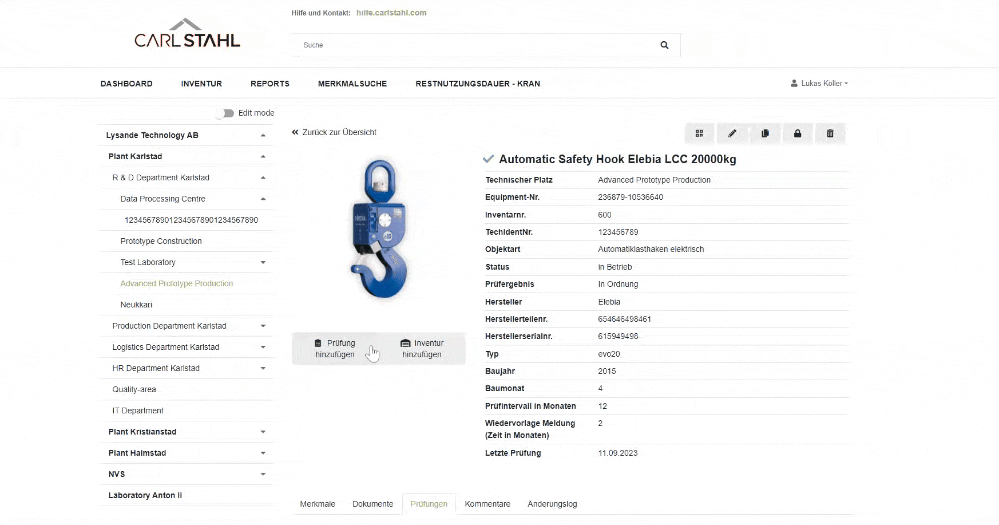
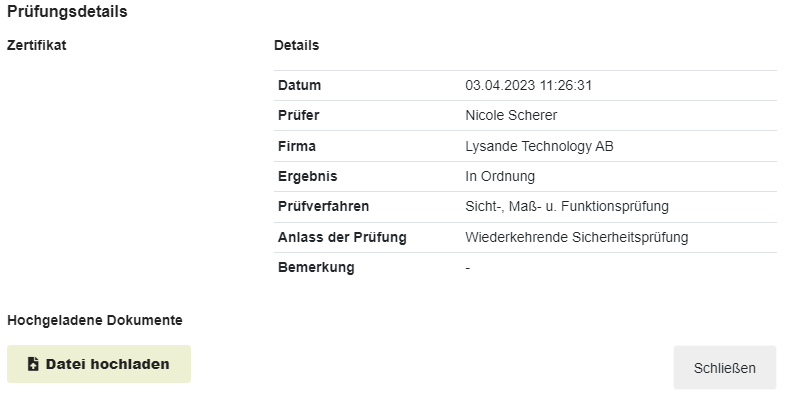
Displaying inspection results
The inspection results can be viewed directly at the corresponding equipment. They are stored there under the Inspections tab. After the inspection has been carried out by Carl Stahl, the inspection certificates are automatically available there in the form of a PDF file.
Language in the certificate
Existing certificates can no longer be changed. This is a legal requirement. This is because existing certificates are fixed and may no longer be changeable in any way.
However, the language in the certificate can be changed for future exams. The decisive factor is the set language of the user who adds the check. Whether in the app or in the equipment portal. The user must change their language via their profile settings. Then the certificate will be created in the corresponding selected language. It is recommended to write the comments for specific damages in the same language.
Adding an inspection in the equipment portal (Plus/Premium function) with and without generation of a certificate
Authorization to add an inspection:
With certificate: users with the "Inspection App" or "Inspection+ App" authorization groups have the option of adding an inspection including a certificate in the resource portal.
Without certificate: Users with the “Schreiben Plus (Premium Edit rights)” authorization group can also add inspections. However, without a certificate.
The user must now select the corresponding equipment and click on it. Depending on the authorization, the option to click the "Add exam" button appears under the equipment image.
If this button is clicked, the inspection mask appears, in which the inspection date, the inspection time, the procedure, the reason for the inspection and the inspection result with the corresponding optional comment can be filled in. If nothing is changed here, the existing values are taken over, which by default are Visual dimensional functional procedure; Recurring safety inspection as well as the current date and time. The inspection result is the only mandatory field that must always be manually assigned. The comment field is optional.
Then click on Submit so that the inspection is created.
The inspection created in this way can be found in the Inspections tab on the equipment. If the user is authorized to create certificates (see above), the certificate is displayed in the Certificate column and can be downloaded from there. This must be updated once after the inspection has been added. If the user has no authorization for automatic certificate generation, he can upload a certificate manually at this point.
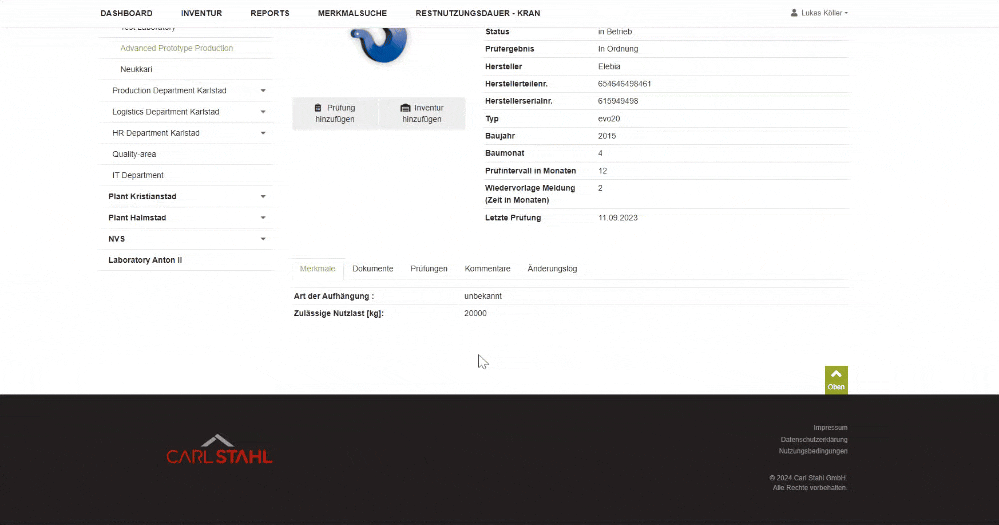
Display inspection images / damage images
Inspection images, also known as damage images, that have been added to an inspection via the Inspection+ app are transferred to the Equipment portal when the Inspection+ app is synchronized. It doesn't matter whether the image is added during the inspection or subsequently. The image is then added to the inspection in the equipment portal as well. Clicking on the orange highlighted area, in the screenshot "Inspection tab", opens a window with the inspection details. In the "Uploaded images" area, if an image has been added, the damage or inspection image is displayed.
Upload additional file / images to the inspection (Plus/Premium function)
If a user wants to upload an additional File (damage images, inspection book or similar) at the inspection, he can do so by going to the corresponding relevant inspection on the Equipment tab and clicking on it. With the button Upload file a document can now be uploaded.
The uploaded document is then also available here in this view below the certificate (if the user is allowed to generate certificates automatically).
Manufacturer inspection (Plus/Premium function)
Below the field for a note, you have the option to declare the inspection you're adding as “Manufacturer Inspection”. If you marked the field “manufacturer inspection” the inspection will also be listed under “Inspections”. The difference will be, that instead of having the organization of the user in the column “Inspection company” it will then show “manufacturer inspection”.
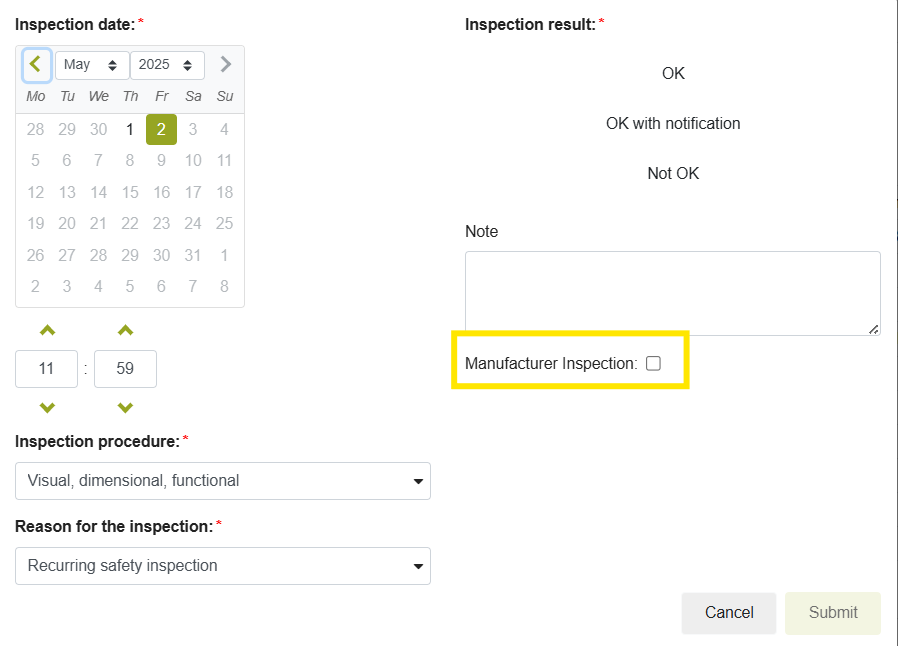

The user who performs the manufacturer inspection should accordingly have no right to generate certificates (Delete Inspection App or Inspection+ App group accordingly). Then the PDF field remains empty.
As soon as the user has added the inspection details, the file can be added by clicking on the inspection details in the "Inspections" tab. (See image above, analogous to adding other files).
Informative: The document uploaded with this procedure as additional documents does not show up in the certificate download.
!!Attention: The uploaded document cannot be deleted again!!
Inspections in the change log
In the change log you can see not only whether an inspection was added, but also whether a certificate was generated or a document (damage image, inspection book or other medium) was added to the inspection.
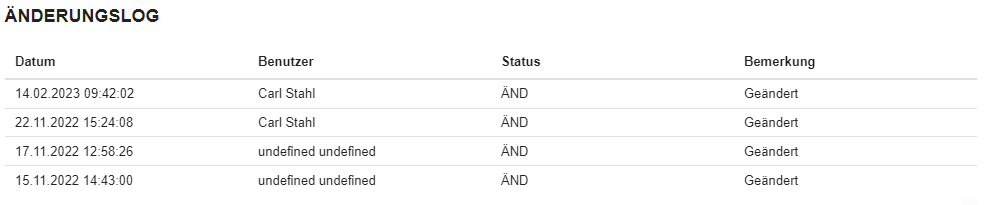
In the example, an inspection was created here. (Change log: Inspection added) Since the user has the permission of certificate generation (permission group Inspection App / Inspection+ App), an inspection certificate was also generated directly after updating the page (Change log: Inspection certificate added). After the user subsequently added a harmful image (change log: Inspection file added), the certificate was automatically regenerated, which now consists of the inspection certificate and the attached document (change log: Inspection certificate added). This results in the 4 entries instead of just one.
Note: If the inspection was added via the Inspection+ app by a Carl Stahl employee as part of a regular inspection, the timestamp is within a few seconds, because with synchronization all the data is transferred over simultaneously and thus the steps are written individually, but were performed in one.
Signature on Inspection Certificates
In our system, inspection certificates are created exclusively by authorized users who hold the necessary permissions. For each inspection, the following information is automatically documented by the system:
Reason for the inspection
Inspection procedure
Performing inspector
Timestamp of inspection (date and time)
The associated PDF certificate is no longer editable after it has been generated. The inspection itself is permanently linked to the respective user and stored in a tamper-proof, auditable manner.
Digital signature optionally available
In many cases, the system-based, traceable documentation of inspections and users makes a handwritten signature unnecessary.
If a visible signature is still required on the certificate, it can optionally be added within the system. Inspectors have the option to store their digital signature in their user profile, which is then automatically embedded in all certificates they generate.