Equipments
A piece of equipment describes a tool or a device. Ideally, each piece of equipment is due for inspection separately and can have its own status, characteristics and inspection due date.
Equipment fields and their explanation
Mandatory fields for equipment are:
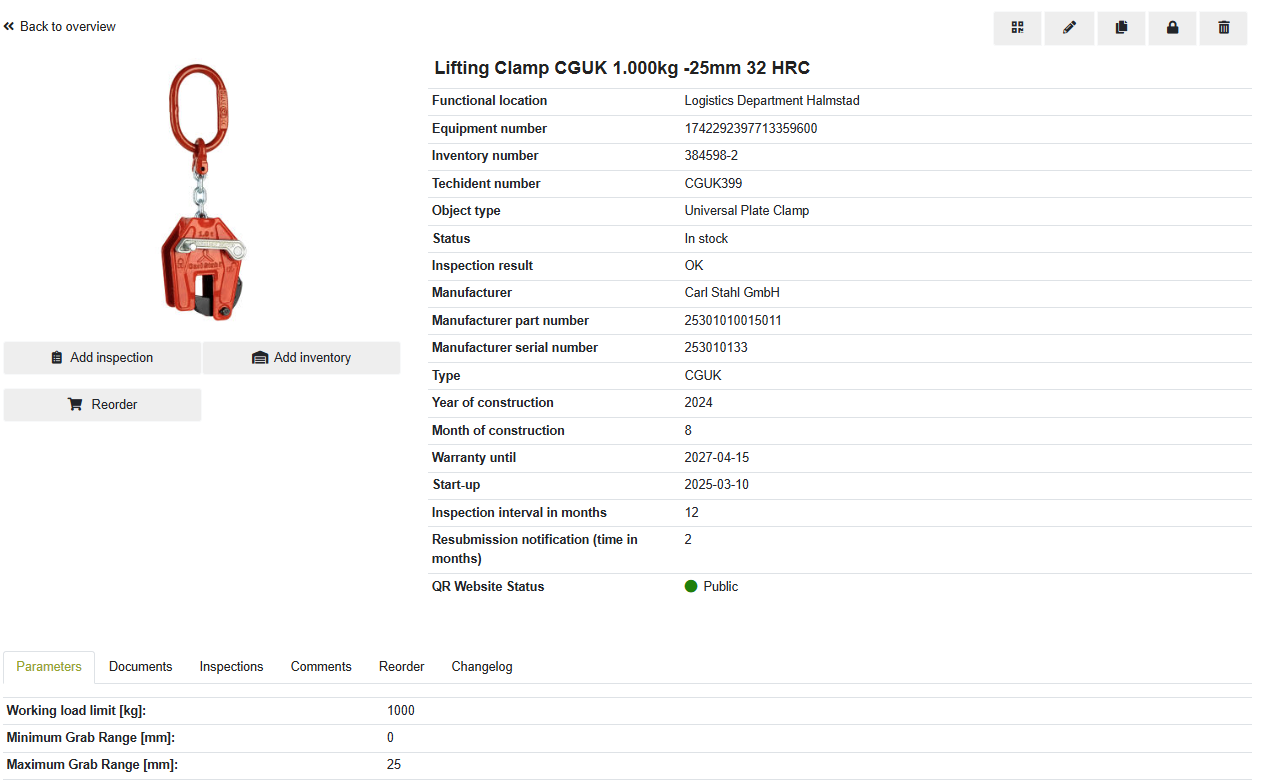
Designation (name) of the equipment. In the above example, “Lifting clamp CGUK 1,000kg -25mm 32 HRC”
the object type, i.e. what type of equipment - Depending on the object type, the characteristics available on the equipment differ, e.g. “universal plate clamp” or “Lifting point screwable”
The status of the equipment. That is, whether it is “in stock” / “in use” / “not in use” or “end of life”. Depending on this, it ends up in other tiles
The functional location
Sometimes individual characteristics can be mandatory.
Optional fields on the equipment are:
Inventory number (please do not use any special characters here, especially no “/” as this can lead to several subfolders in the ZIP file when downloading the certificate)
TechIdent Number. - this is usually the scannable number, e.g. the barcode/RFID code or QR code
Manufacturer, manufacturer part no., manufacturer serial no., type for a more precise description of which product
Year and month of construction (please enter 8 for August for the month of construction )
Expiration date: Depending on this, the equipment automatically receives the status Product life end reached on the day it is exceeded.
Warranty date (informative)
Start-up date: if this is set to the past during creation, the equipment is put into operation directly.
QR code URL (see QR code on the equipment)
Description: Additional IDs and numbers can be entered here. The description is always searched when searching. Further information that you would like to search for can also be entered there, and fields that do not exist on the equipment, such as a drawing number, can also be entered here.
The inspection interval in months and the resubmission date (i.e. when the equipment should appear in the tile soon)
The characteristics at the bottom of the equipment see properties on the equipment
Create new equipment
To create a new equipment, click on the corresponding functional location and click on the + button in the upper right corner. This will take you to the equipment editing screen. Now fill in the fields. The mandatory fields are marked with a red star*.
The more information you enter (e.g. serial number, type, inventory number), the better you can search for the equipment.
Depending on the selected object type, different characteristics can be stored for the new equipment. (The object type cannot be changed later). The commissioning date, expiration date, and warranty expiration date can also be stored here. However, the commissioning date does not trigger an automatic inspection. The date is only a characteristic. An inspection before commissioning must be added manually via Inspections and certificates
Once you have entered all the information, you can save the equipment and it is created.
You can select the inspection procedures directly in the system under the Inspection Procedures tab. There you can specify which inspection procedures are to be used and when the equipment is due for inspection.

Inspection procedures are not mandatory when creating new equipments. For equipments that don't require inspections, the inspection procedure tab can be left blank.
Pro tip: All fields outside the characteristics are searchable—e.g., use name or description
You can enter information in all of the fields above (except characteristics), which you can then search for using the search function. For example, you can enter an additional internal identification or drawing number or similar in the description field and then use this number to find all equipment that has this number. So feel free to use the description as a searchable field.
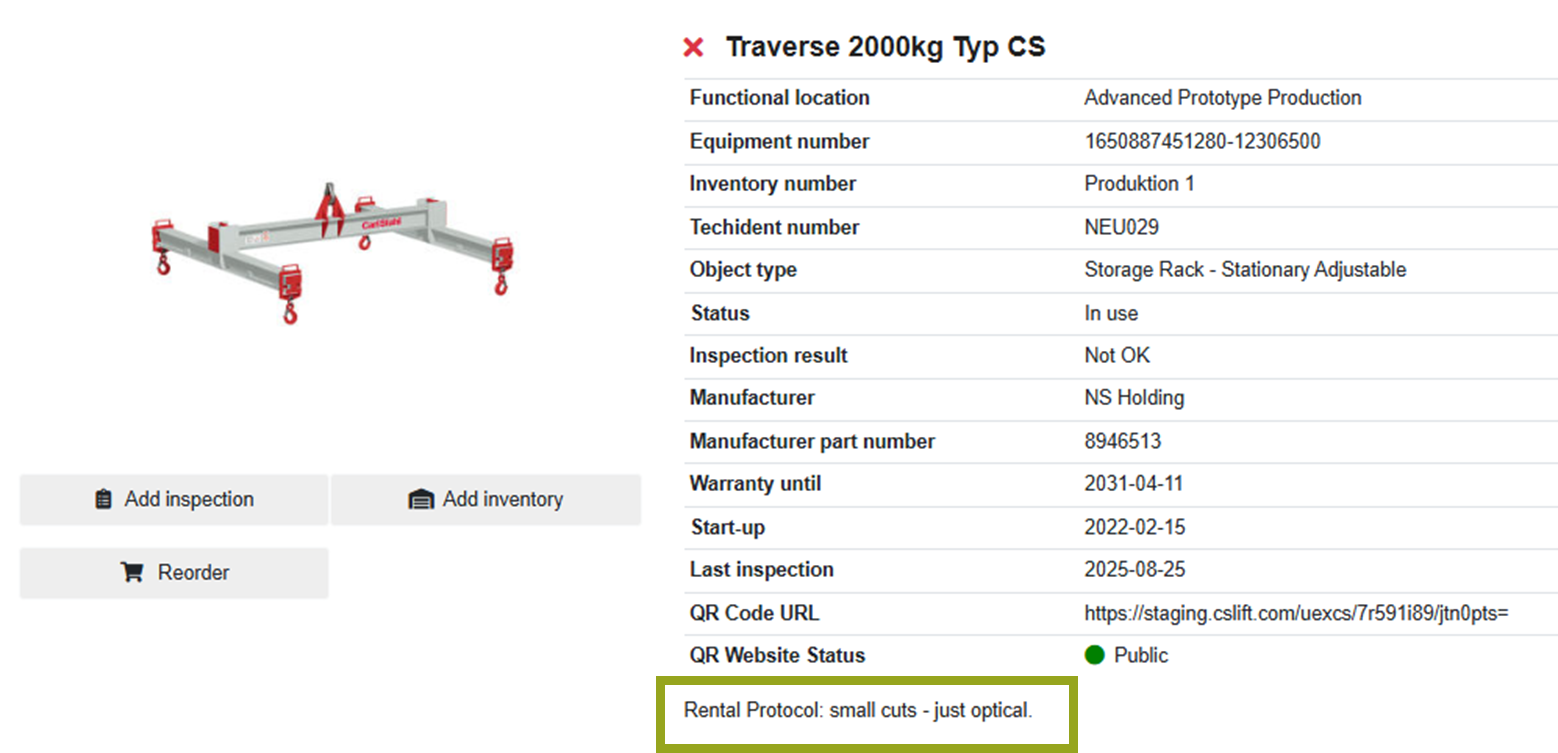
You can also display loan/rental logs in the description, for example, to show defects or organizational information.
Edit equipments
Edit a single equipment
To edit an equipment, go to the corresponding equipment and click the pencil button in the upper right corner. This opens the edit mask. Now all fields can be adjusted except for the object type. By saving the changes are taken over.
Edit inspection procedures
Only the inspection procedures are not located behind this pen, but can be edited directly via the Inspection Procedures tab with the appropriate rights. To do this, click on an existing procedure to customize it or click on “Add” to add a new procedure with the appropriate interval.
Edit multiple equipments at once
To edit several pieces of equipment at once, you must first select the pieces of equipment that you want to change. To do this, simply click on one of the tiles in the equipment overview and then click on the small circle on the far right of the equipment. As soon as one or more pieces of equipment have been selected, the buttons above the equipment list become active. The desired action can then be selected via one of the buttons and will be executed directly. A pop-up window indicates when the action has been successfully executed.
Technical locations can also be marked. This automatically marks all the equipment that is in the respective functional location and changes it with the selected action.
Currently the following mass actions are available:
Excel export
Certificate download
Move
Lock/Unlock
Recycle
Status change
Update check interval
Delete
Empty recycle bin
The available actions can differ from page to page. In the recycle bin, for example, besides the Excel export, there is only the possibility to restore or delete equipment or to empty the recycle bin.
This feature allows you to quickly and efficiently change data for many pieces of equipment in a single group edit.
Upload product image
Click on the button Select image on the equipment. Now select the appropriate image and confirm it by clicking the Save button. You can delete a product image by clicking the X on the image. The following illustration shows how to do this:
Lock / Delete equipments
You can lock or delete a piece of equipment using the edit bar at the top right of the equipment.
Lock and Unlock equipments

Please note: when you open a locked equipment, you only have the Unlock or Copy buttons to choose from in the edit bar. For example, to edit the equipment, you must unlock it first.
Delete and restore equipments
If you press the trash button at the top right of the equipment, the equipment will be moved to the trash. Now only the restore, delete completely and copy buttons are available. After complete deletion, the equipment is completely deleted from the equipment portal. The equipment can only be edited after it has been restored.
Restoring a piece of equipment. automatically sets its status to "in use", regardless of whether it had the status "in use" or "out of use" before it was thrown into the trash.

Copy an equipment
The copy button at the top right of the equipment copies the equipment with all its data.
Only the individual data such as inventory number, TechIdentNr., manufacturer serial number and product image are not copied. These are always individual and unique for each piece of equipment and must be reassigned.
Error: Not all equipments are displayed
Please make sure that the summation of key figures is set to "Yes" in your profile, because this is the only way to display equipment from subordinate functional locations. If you have any further problems, please contact your Carl Stahl contact.
Equipment inspection procedures
As shown above for the equipment creation and editing, inspection procedures can be easily added to an equipment item in the “Inspection procedures” tab.
Each equipment can now have multiple inspection intervals stored – one per procedure, e.g., 12 months visual inspection + 36 months magnetic particle inspection
These inspection intervals can be flexibly stored in days or months.
If a procedure is overdue, the entire EQ is due
If an equipment is copied, the inspection procedures are also copied, but can be adjusted
The inspection procedure on the equipment is color-coded to indicate which inspection procedure was OK/NOK/OK with note during the last inspection
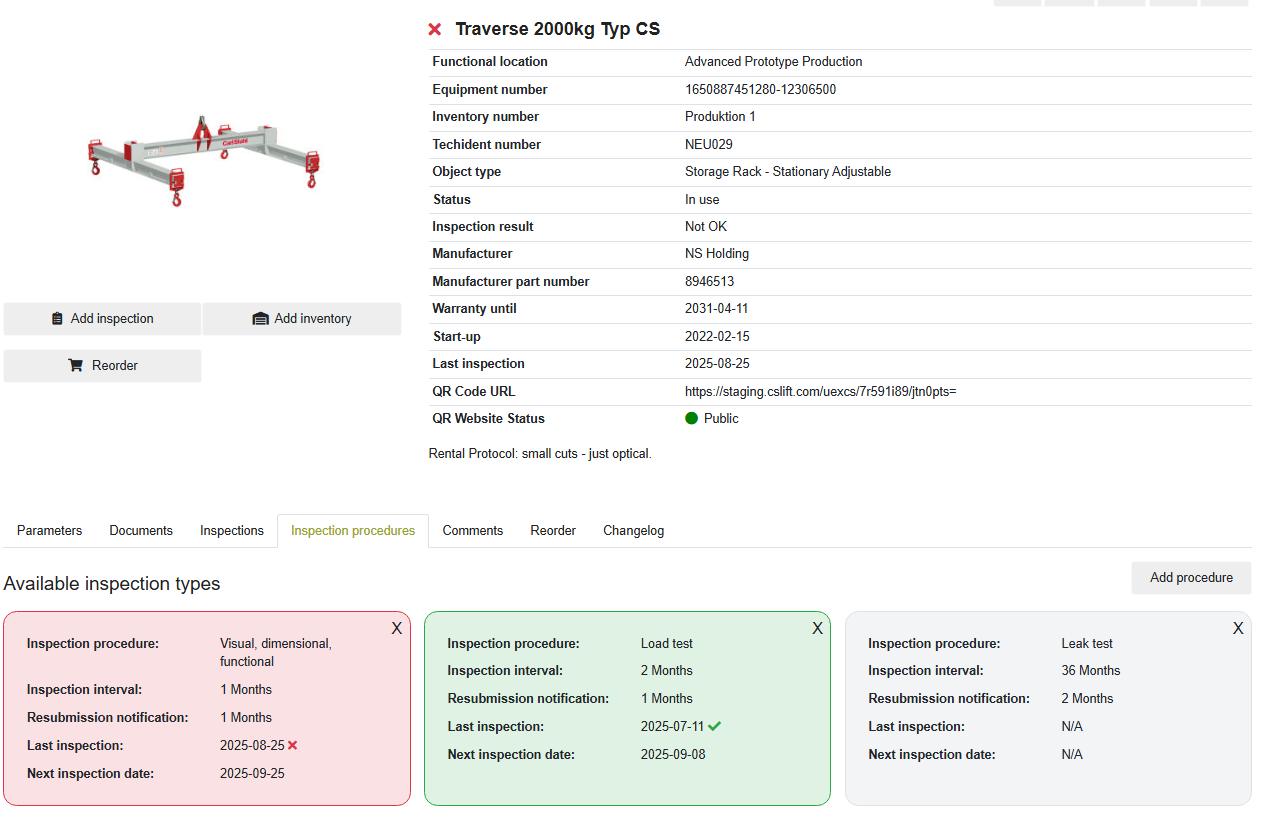
Gray = The EQ has never been inspected in this procedure
Green = Last inspection in this procedure OK
Yellow = Last inspection in this procedure OK with note
Red = Last inspection in this procedure NOK
If the inspection result for only one procedure is NOK, the entire EQ remains NOK.
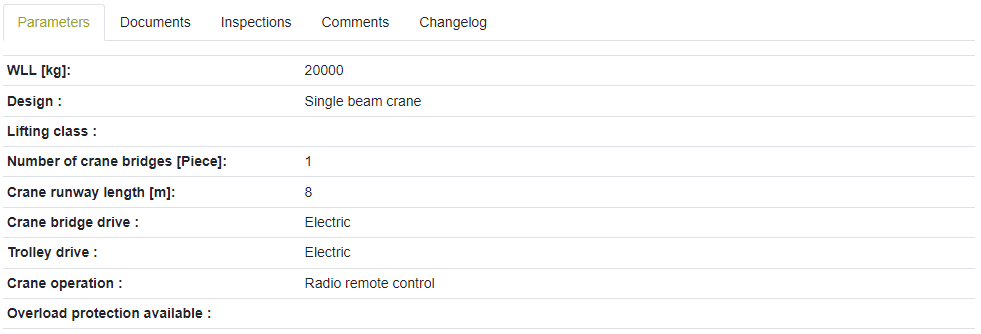
Equipment properties / parameters
Depending on the object type, the equipment can have different properties. These can be viewed in the equipment properties tab. The characteristics were initially assigned when the object types were created and can be added. The characteristic values are transferred from the company's internal SAP system, so that all product classes later in the automatic equipment assessment already have pre-filled characteristics.
Characteristics can be mandatory or optional. In the case of mandatory data, it is not possible to save without this data. For some characteristics, it is possible to select from a list of characteristic values. For other characteristics, the user can provide individual input.
The characteristics are edited in the same way as the other fields on the equipment using the pencil button to switch to the equipment editing screen.
Upload and manage documents within the equipment (Plus/Premium-function)
Various documents can be uploaded on the equipment. With the appropriate authorization (e.g. “Schreiben Basis (Basic Edit rights)”), users can upload individual documents here. The documents can then be viewed by everyone at the equipment.
The overview of the documents then shows whether the document is currently valid (green), has expired (red) or was assigned universally without a validity date (gray).
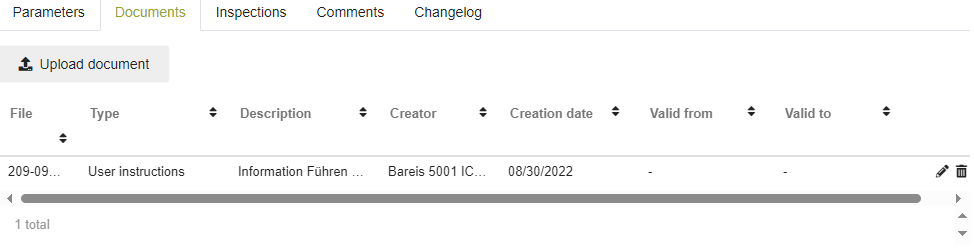
Upload Document
Click on the Upload document button.
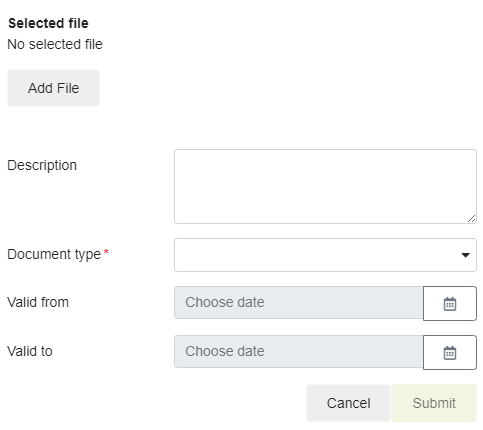
Now some more information about the file can be given like a description, which document type it is and the validity date.
Inspection of the equipment (Plus/Premium-function)
In the tab Inspection of the equipment all inspections performed up to this point of time are displayed. See also: https://help.carlstahl.com/EN/inspections-and-certificates#Inspectionsandcertificates-2
QR Code of the equipment (Plus/Premium-function)
With the authorization group “Schreiben Plus (Premium Edit rights)”, an automatically generated QR code can be called up on the equipment. Print this out and attach it to the equipment. Then anyone with a smartphone can access the latest test certificate by scanning the QR code, as well as retrieve documents such as operating instructions - all without a login or user account.
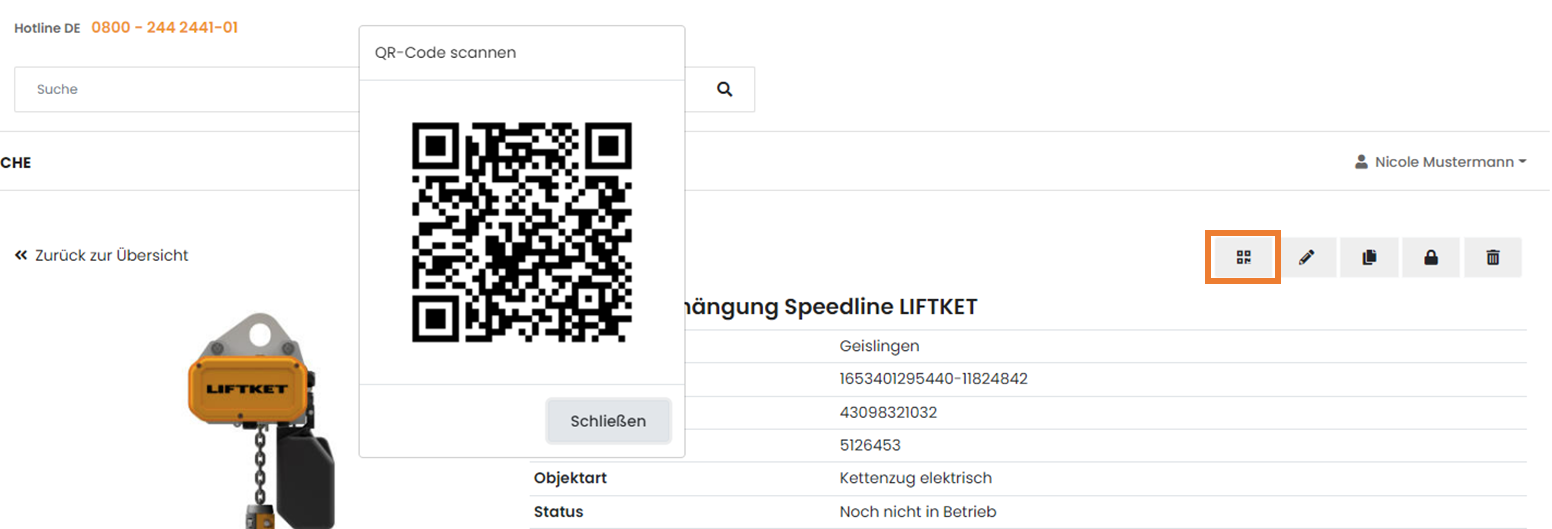
Abruf des QR Codes über den Button am Equipment
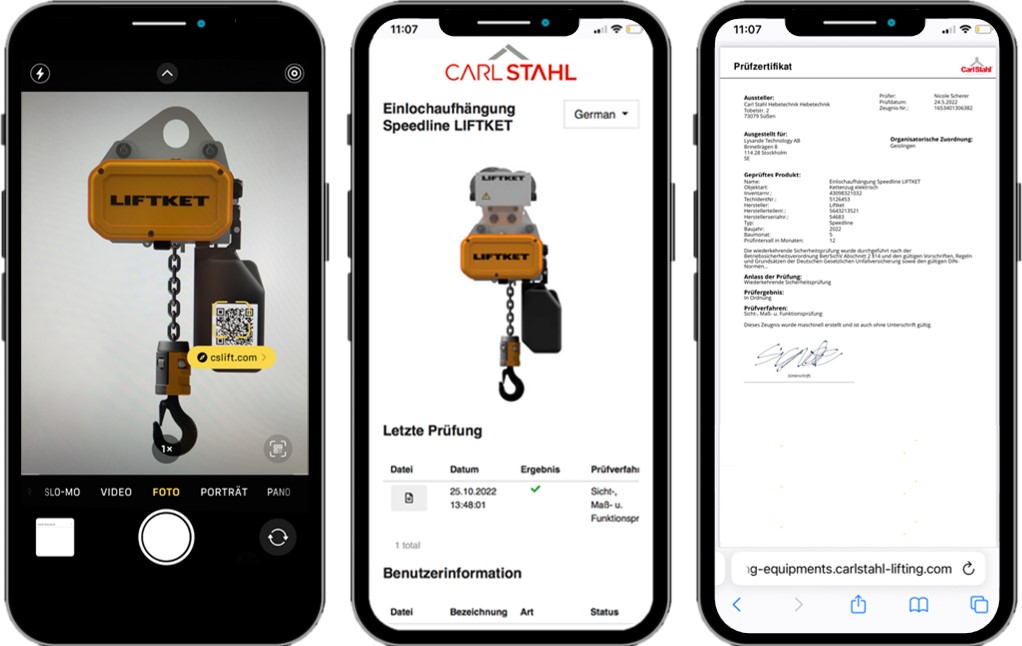
After scanning the QR code, you will be taken to a publicly accessible page with the linked test certificate of the last test as well as documents such as operating instructions.
The QR code function can be called up on all equipment that is not locked or in the trash. The “Schreiben Plus (Premium Edit rights)” authorization group is required to retrieve the QR code on the equipment.
On newer smartphones, the QR code can be retrieved directly via the camera function. As soon as the camera has detected the QR code, please click on the link. The browser will now open and take the user to a publicly accessible page with the following information:
Name of the equipment
The date of the last test with linked certificate of the inspection
A list of all documents of the user information type, such as operating instructions. It is also visible whether these are valid on today's date by means of the status / validity date
Comments within the equipment (Plus/Premium-function)
If you want to make a communication to a certain equipment, you can do this gladly over the comment function. e.g. info to the repair, current statuses or the like. The comments can be made, viewed and deleted in the comments tab.

You can also delete your own comments via the field at the top right.
Note: Comments that are added are not visible in the change log. I. e. no entry in the change log via the comment function.
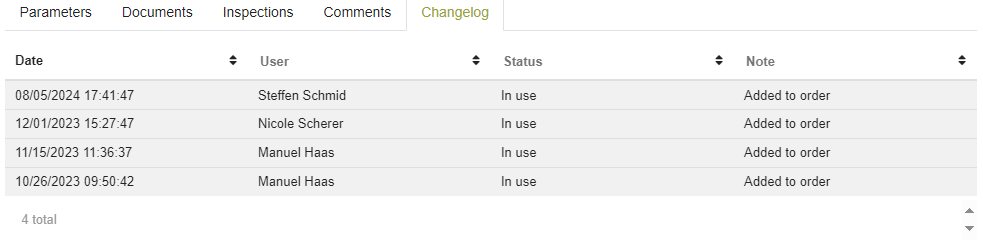
Changelog
All actions performed on the equipment are recorded in the change log with the date, user and a comment as well as the current status at the time of the change. This means that all transcations performed can be traced over the long term. Data from the change log cannot be deleted as long as the equipment exists in the resource portal. Changes that have been made in bulk or by the system are also displayed here. When the user is deleted, however, the personal data (user name) in the change log is removed.
Some changes generate entries for which a detail window with more specific information can be opened by clicking on the respective entry.
Entries with the option to open such a detail view are darker in the change log than those without this option.
Actions recorded in the change log
The following actions generate an entry in the change log:
Create equipment
Edit equipment
comissioning
add equipment to the inspection order
remove equipment from inspection order
add inventory
add inspection
edit equipment action in the equipment tab “reordering”
recycle equipment (depending on whether already in operation before, the remark is "initial commissioning" or "restored")
For the actions create equipment, change equipment, add equipment to test order, remove equipment from test order, a detail window with further information is available in each case.
If an inspection is created for an equipment using the “add inspection” button, then there may be multiple "Inspection document/inspection certificate/inspection added" entries, if the user has the Inspection + or Inspection App permission. More details can be found here:
Inspections and certificates | Inspections in the change log
Delete equipment = deletion of the change log
If an equipment that is already recycled is deleted, the user is taken to the dashboard.
The equipment and its change log no longer exists.