Importfunction/Importer
With the Importer, only one object type can be uploaded to one functional location with the current status.
No documents or parameters data can be imported.
We have developed a first state of the import function, which will certainly be extended in the future.
Here you can download the import template. Fill the file as you like
equipment_import_template_english.xlsx
Please pay attention on the Legend for the columns in the Excel. It’s in the Tab “Legend”. Especially the Date must be in the right format or it might cause errors. Please do a pre-import if you are not sure with only 3 Equipments.
Authorization
To get access to the importer the authorization group "Equipment-Import" is required. This must be added to the user via the backend. If you are interested, please contact your Carl Stahl representative or write via our contact form.
The authorization group is described here.
Overview
Explanation of the columns in the screenshot below.

Name | The name that was entered for the import. It is recommended to include the object type. |
Type | Currently only "Equipment" is selectable here. For future functions there may be other selections here |
State | Imported/Returned, these two statuses exist. Reverted can only be performed by the TIM team. |
Imported/Failed/Import Size | Number of imported Euipments/Number of errors during import/Total number of equipments |
Imported by | Email from the importing person |
Date | This is the date on which the import was performed. |
New import
With a click on the button "New import" a new import can be added.
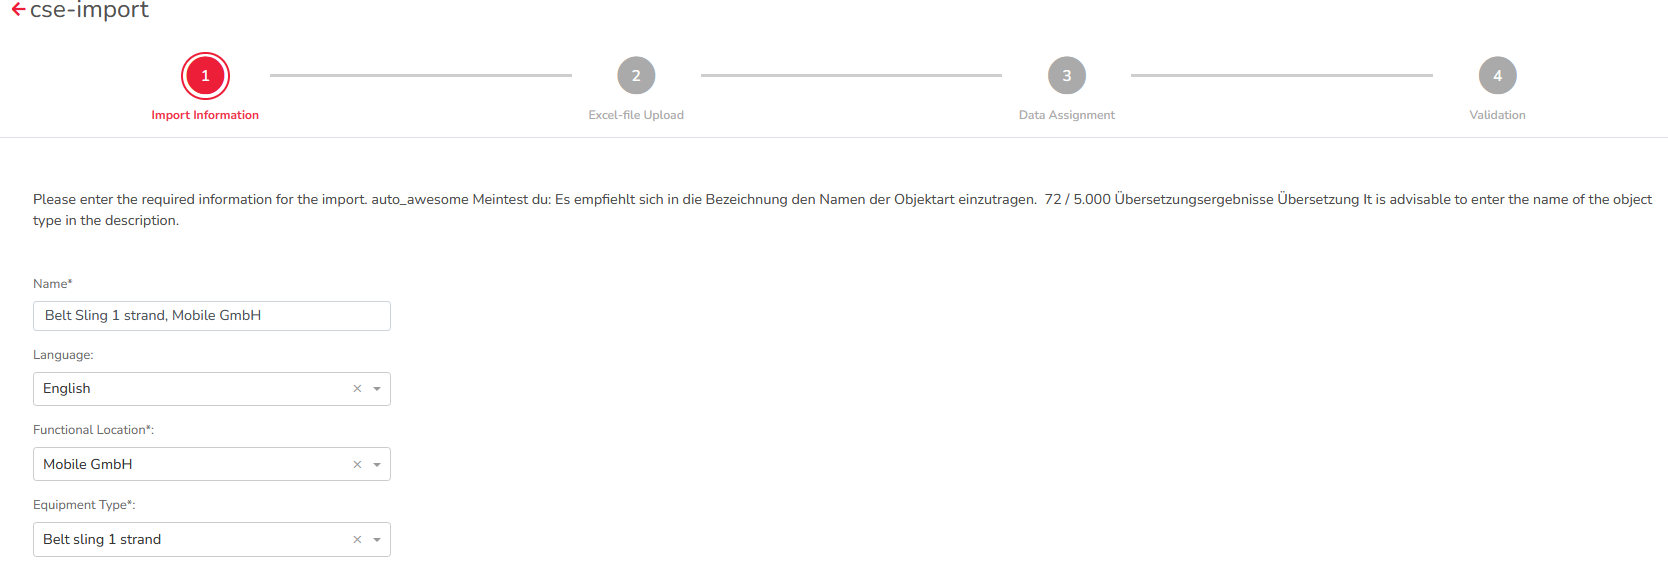
Step 1 - Import information
In the description it is recommended to enter the object type and if necessary the functional location. A subsequent identification is not possible with the current status.
The language is necessary for the equipment database.
Selection of the functional location is currently only searchable by letters. An organization number is not displayed with the current status.
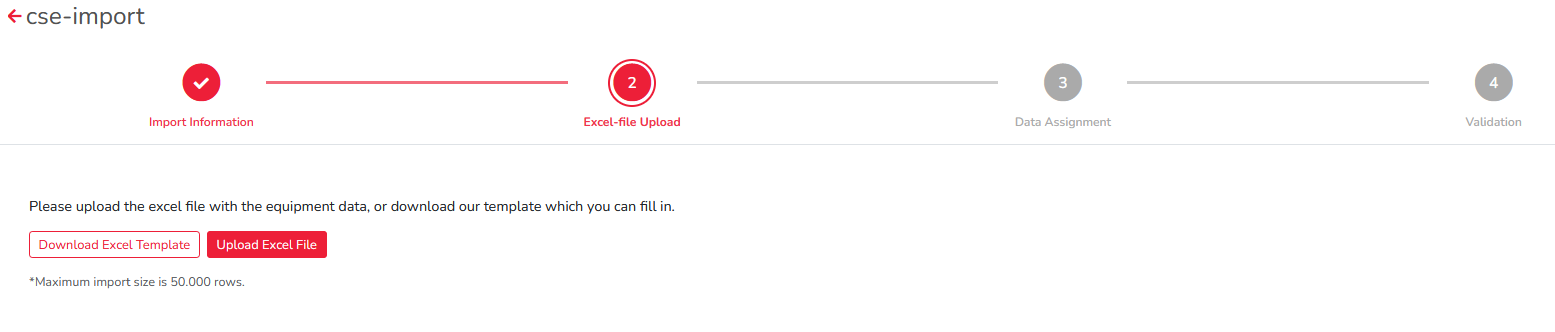
Step 2 - Upload Excel file
Here please either download the template and upload it filled or upload your own excel file. The maximum size of the file is 50,000 lines. Only the first tab is considered (spreadsheet 1). The headings must be in the first row. This means that the equipment from row 2 onwards will be taken into account and imported.
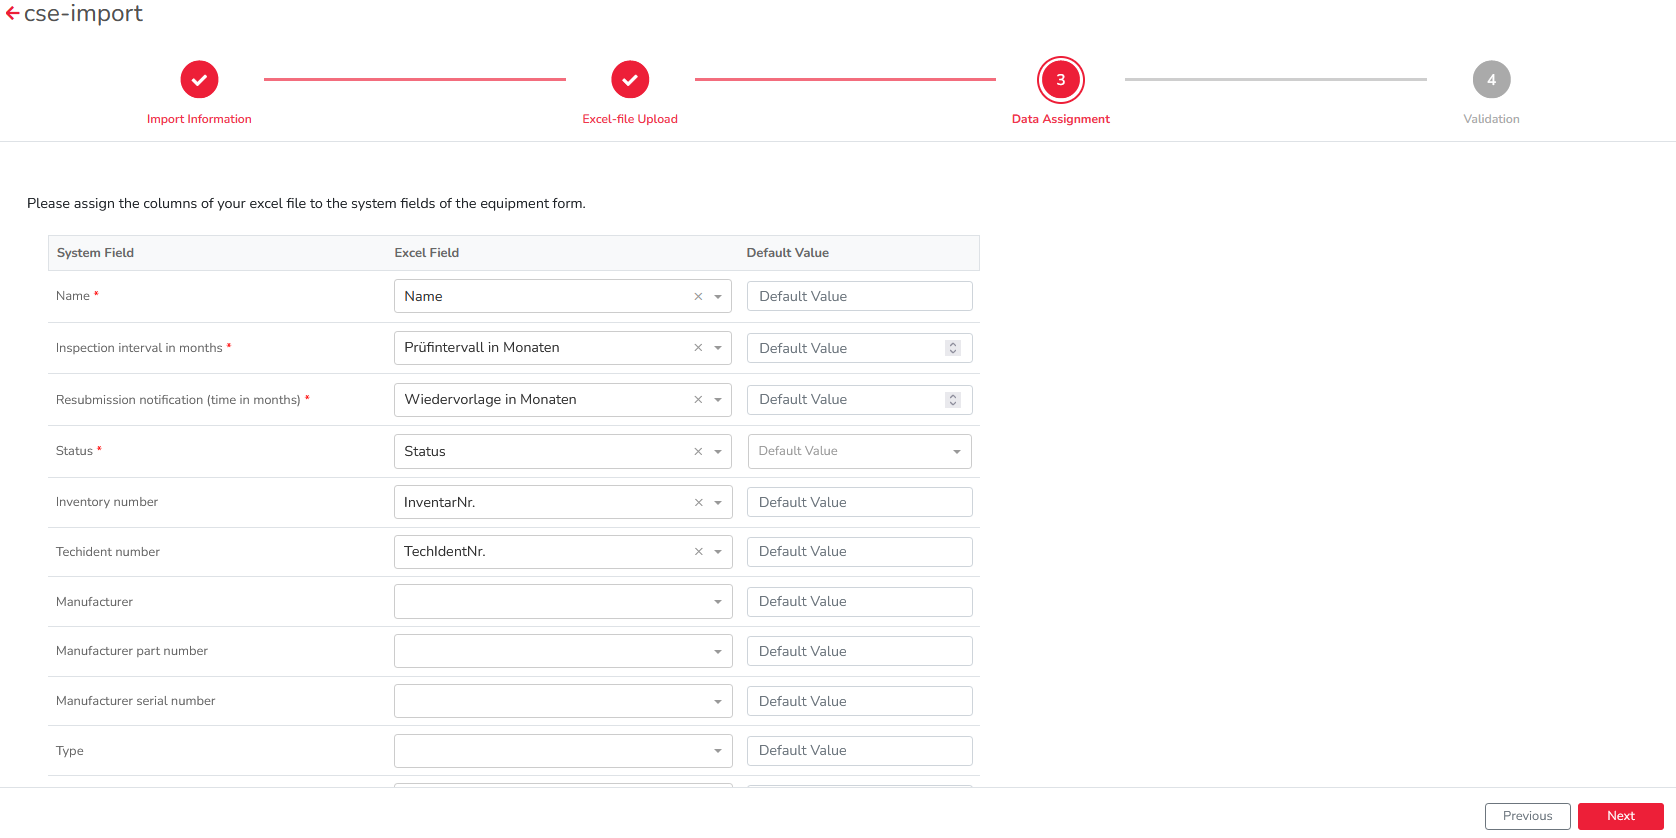
Step 3 - Data assignment
In step 3 the excel fields (headings from line 1) have to be added to the system fields. The order of the dropdown is the order of the headings from left to right.
The first four lines "Designation, Inspection interval in months, Resubmission message and Status" must be assigned. All other lines are optional and can be displayed. Only those headings are displayed where at least one field is filled. For example, if the TechIdentNo. is not filled in for any equipment, it will not be available for selection in the dropdown.
In the line "Value, if line empty" a value can be entered, which will be taken over, if there is nothing in this line for this equipment.
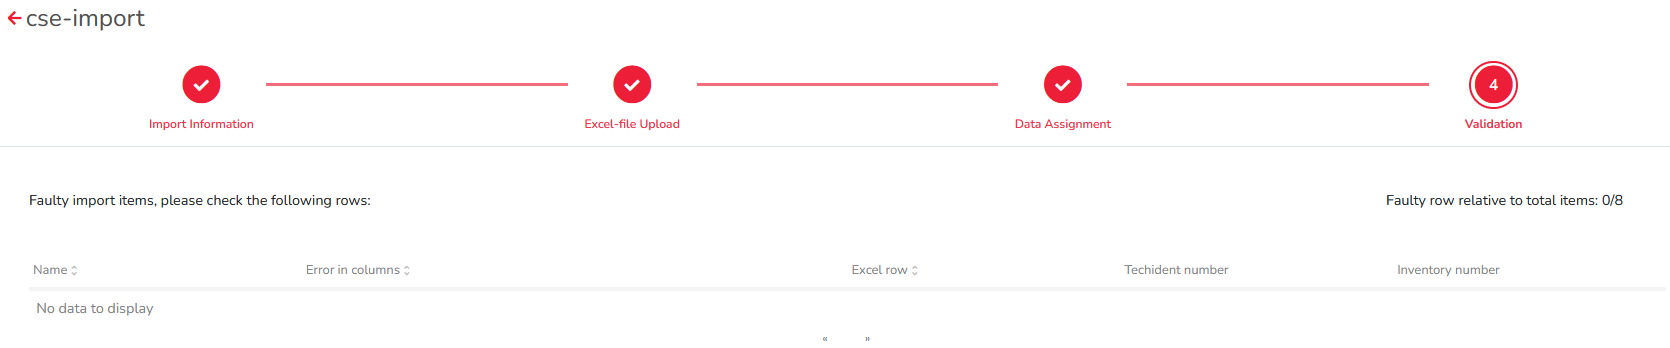
Step 4 - Validation
In the last step, the number of faulty equipments in relation to the total number is displayed in the upper right corner. The number of faulty equipments is displayed with the left number.
In the list overview, ONLY those pieces of equipment are displayed for which an error occurred during import. The error is displayed in the column "Error in column". There is either a wrong format, a wrong entry or a wrong assignment, as in the example in the screenshot.
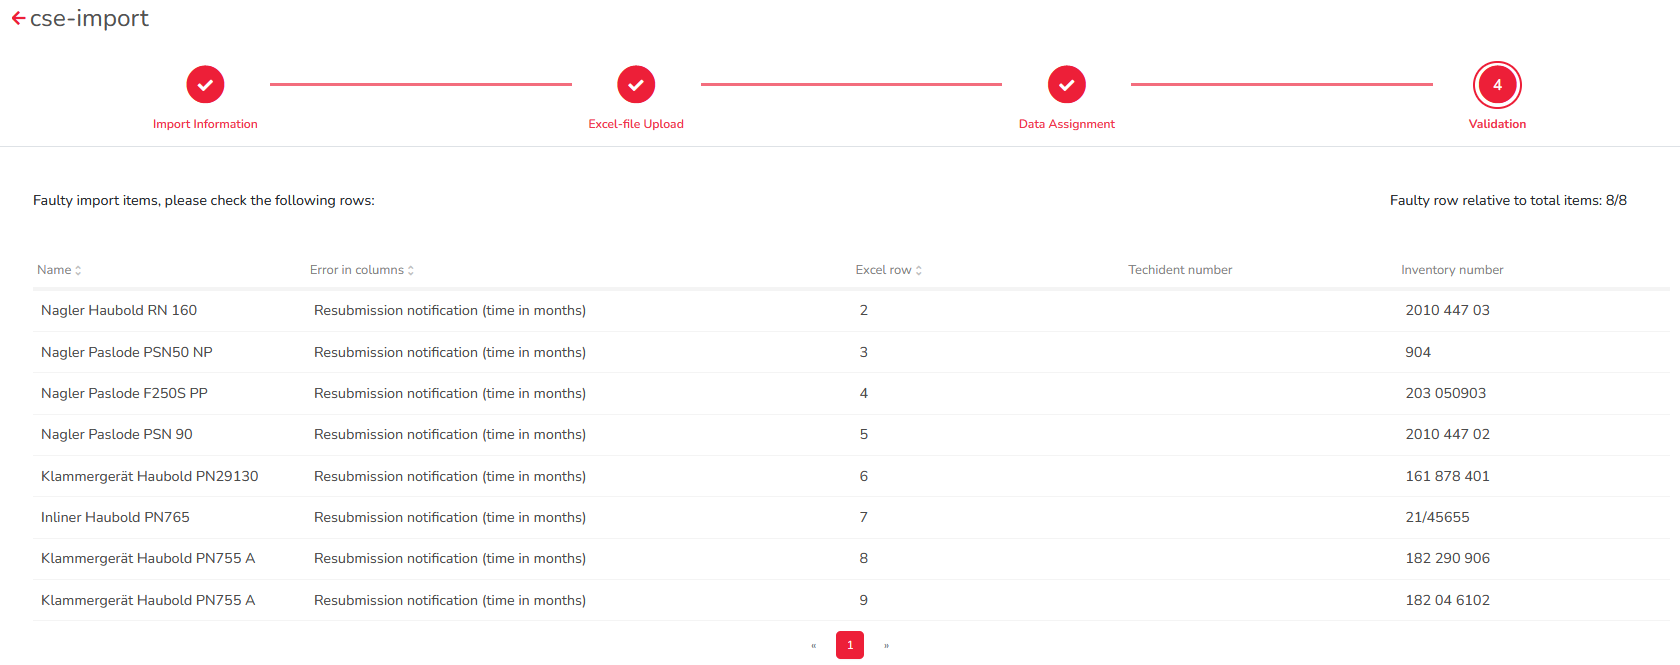
If no erroneous imports have been made, then the first number will be 0 and the list below will be empty.
By clicking the Finish button, the import is performed and the equipment is placed in the selected technical location and object type. The transfer is in real time and requires at most a refresh of the browser page.